Fixing the WDF_VIOLATION on HP computers
To resolve the WDF_Violation blue screen crash you need to rename or delete the HpqKbFiltr.sys driver. The problem is that this conflict causes Windows 10 to crash before you can get into the operating system to remove the file.
Therefore, you need to delete it before Windows 10 starts by going into the Advanced options Command Prompt. To remove or rename the HpqKbFiltr.sys file, please follow these steps:
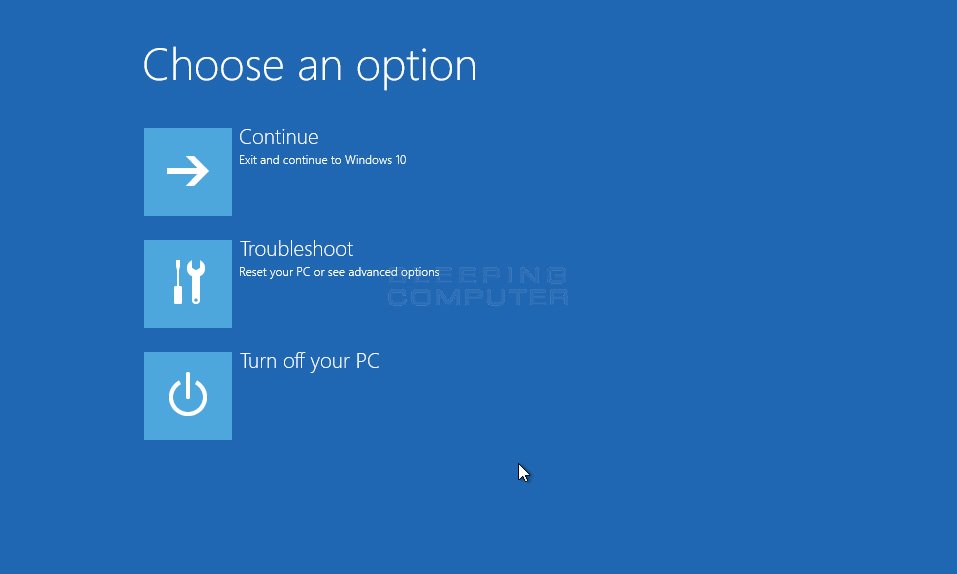
- When Windows starts after the crash, it should show you a recovery screen something like the one below.
- They might be on a slightly different menu and need to go to Advanced Options before you see this screen, which will let you Troubleshoot:

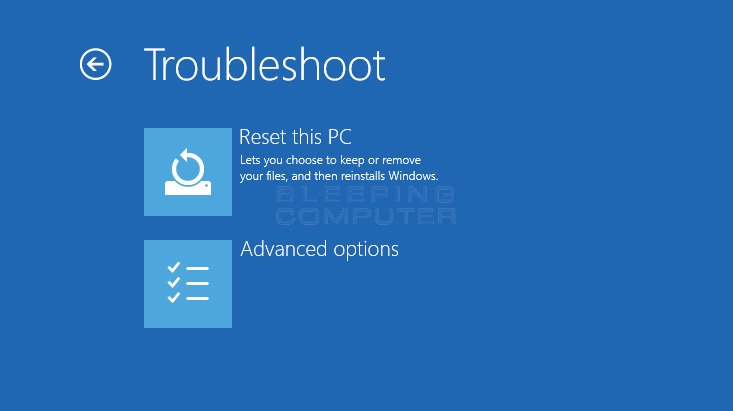
3. You will now be shown the Troubleshoot screen below, where you should click on the Advanced Options button.

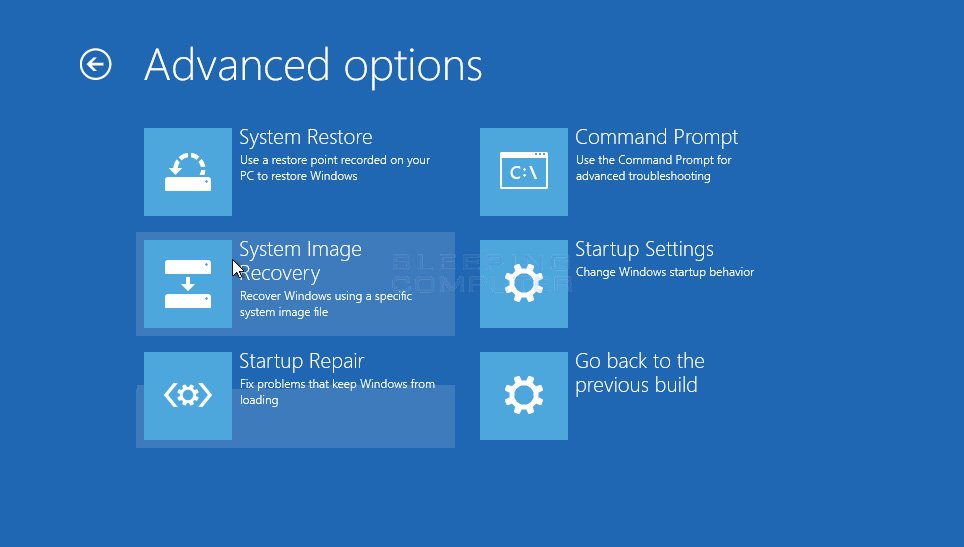
4. At the Advanced Options screen below, click on Command Prompt (there may be extra options here too like UEFI boot settings).

5. This will launch the command prompt in a window
6. First we need to work out which drive letter is mounted as the system drive – in this recovery mode it might not be C:\
7. This command will show you the OS partition: bcdedit /enum | find “osdevice”
8. It will return osdevice partition=C: if it’s used C:\ to mount the system partition
9. Now you need to rename the faulty driver.
10. Navigate to C:\Windows\System32\drivers (or wherever the first bit said was the right drive letter) with:
c: <enter> cd windows <enter> cd system32 <enter> cd drivers <enter>
11. Check if the folder you’ve arrived at looks like C:\Windows\System32\drivers>
12. Type ren hpq and press <tab> – this should autocomplete to ren HpqKbFiltr.sys
13. Type hpq <tab> again and add .old to the end – the full command should read ren HpqKbFiltr.sys HpqKbFiltr.sys.old, now press <enter>
14. It won’t return anything if this is successful, you can check it by typing hpq <tab> and see that it autocompletes to HpqKbFiltr.sys.old.
15. This has worked 5/9 times I’ve tried it remotely. Not sure what went wrong with the other times.
16. If that hasn’t worked, you can also check the logs in C:\Windows\System32\LogFiles\Srt\SrtTrail.txt to see if there are other misbehaving drivers (see also here):
notepad C:\Windows\System32\LogFiles\Srt\SrtTrail.txt
17. This will open up the log file in notepad, scroll right to the bottom to see what other driver it’s complaining about. If you can work out what that is you can try ren driver.sys driver.old to rename it – probably take a note of what it was first.
18. Another culprit is in C:\Eindows\System32\drivers\wd, try renaming or removing all files in this folder as well
c: <enter> cd windows <enter> cd system32 <enter> cd drivers <enter> cd wd <enter>
ren wdfilter.sys wdfilter.sys.old
ren WdBoot.sys WdBoot.sys.old
ren WdNisDrv.sys WdNisDrv.sys.old
19. You can try renaming those all individually or del *.* if you’re feeling confident.
20. If all this fails then you can try running a System Restore (preferably to something before ~12/10/18) from the same Advanced Options menu as Command Line
21. If System Restore doesn’t fix it, check the drivers again – I’ve been able to get 2 PCs that didn’t work initially going again after running a system restore.
22. Microsoft say we should also be using this DISM command to remove the drivers, however it’s very long and doesn’t seem to really work – if nothing else has worked though, it’s worth a shot.
23. Type the following, replacing C:\ with whatever driver letter it should be: dism /Image:C:\ /Remove-Driver /Driver:C:\Windows\System32\driverstore\FileRepository\hpqkbfiltr.inf_amd64_714aca0508a80e9a\HpqKbFiltr.inf
24. If you’ve entered the command correctly it might say something like “DISM error code 2 cannot find requested driver” – I guess this might be normal, I’m not sure.
